
How to make Sweet Pea Scissor Charms.

- Sweet Pea Stitched Felt #117266
- Scallop Circle Die #113469
- Flowers Layers #3 Die #114527
- Crystal Effects #101055
- Crop a dile #108362
- Silver Eyelets #105319
- Big Shot Die Cut Machine #113439


How to make Sweet Pea Scissor Charms.


My video today is on how to make this Easter Bunny Box. You have two choices, you can make it just like this picture….or you can step it up and add some handles. (Handles are rebar tie wire found at Lowes in the lumber area.)

Click here to watch my video on how to make the Punch Art Bunny Face.
Here’s the video …

Thanks for joining me!!


This video will demonstrate how to make the Tall Top Note Box.
Here’s the video…
Here’s the supply list:
Click here if you’d like to purchase the instructions for the Tall Top Note Box. It includes a diagram of where to cut, score & apply adhesive. Click here for the Punch Art Santa.
Thanks!

Good afternoon,
My project today is the same Top Note Box as yesterday….except I used the Punch Art Reindeer on it instead of the Punch Art Santa 🙂

I’m not sure which one I like best….they’re both so stinking cute!!
If you would like to see how to the make the Punch Art Reindeer, click here to head over to my Chic’ n Scratch Live! website to see the video. Or if you’d like to purchase the instructions on how to make the Reindeer click here to head over to my Chic’ n Scratch Shack.
The Punch Art Santa video is ready on my Chic n Scratch Live! website, click here to go there now. And, click here if you’re interested in purchasing the Punch Book Page or the written instructions.
The Tall Top Note box video is loaded on You Tube and I’m working on getting it ready to post & working on the instructions.
Have a great day and thanks for stopping by!!
Click here if you’d like to place a Stampin’ Up! order.
p.s. in less than 12 hours I’ll be watching New Moon….it’s going to be very hard to think about stamps or quilting tomorrow!! I’m sure I’ll be totally obsessed with New Moon and want to talk about it all day. That’s why we’re going to see it again tomorrow afternoon. Get this….I made a new Rag Quilt Purse just to take to the movies. I’m thinking I should have made a blanket given all the hours we’ll be there.

Good morning!
Today’s project is a Keychain Post it Note and I haven’t made one in quite a while. I created the Keychain Post it Note a few years back and I’ve seen it on hundreds of other websites….every time I see one it puts a smile on my face. It’s the little things that bring us joy.

We used the Berry Christmas stamp set with the Christmas Cocoa Specialty Paper. This pattern of paper feels like felt when you run your hand across it.
Click here if you’d like to view my original creation and click here if you’d like to see the video that demonstrates how to make this size and a larger one too.
Here’s the Supply List:
Printer Friendly Version – Download Berry Christmas Post it Notes
Have a great day!

Good afternoon,
My project today is a Photo Coaster Ornament that I made using the 4″ Circle Coasters. You can use either the Heavy weight or Medium weight and if you’re looking for them you can find them on my Chic n Scratch Shack. Click here if you’d like to go there now.

They’re really easy to make them and you can make a bunch real fast. I used the Christmas Cocoa Specialty Paper and I cut it in a 4 x 4 square. Apply adhesive to the paper and attach it to the Coaster. Trim the extra paper off and then sand the edges with a Sanding Block.
The Round Tab punch works perfectly for the top of the ornament and you’ll need around 16″ of White Taffeta Ribbon.
This is a picture of Chase & Brook back when they were really little (if my memory serves me correct, that was 1998). Brook has red paint on her nose because she was in a Christmas play at preschool.
Extra Notes: Today is my Stampin’ Up! anniversary. I’ve been a Stampin’ Up! demonstrator for 7 years 🙂 And today is the internet’s birthday. The Internet is 40 years old today….isn’t that interesting?
Here’s the Supply List:
Printer Friendly Supply List – Download Photo Coaster Ornament
Have a great day!

Today’s project is How to make this Mini Baskets & Blooms basket.

In this video I will teach you how to make the Mini Baskets and Blooms Basket using the Mini Baskets and Blooms Dies and a Die Cutting Machine.
The base of our basket is Crumb Cake Cardstock and don’t you love the beautiful Chocolate Ribbon?

Here’s the Stampin’ Up! Supplies needed to make this darling basket….

Frankie Box | Frankenstein Box | Franky Box
Today’s video is on how to make the Frankenstein box or a Kit Kat Holder. The only size difference is the hair measurements (the hair on the Kit Kat holder is 2 1/2, versus 2 3/4 on the box).
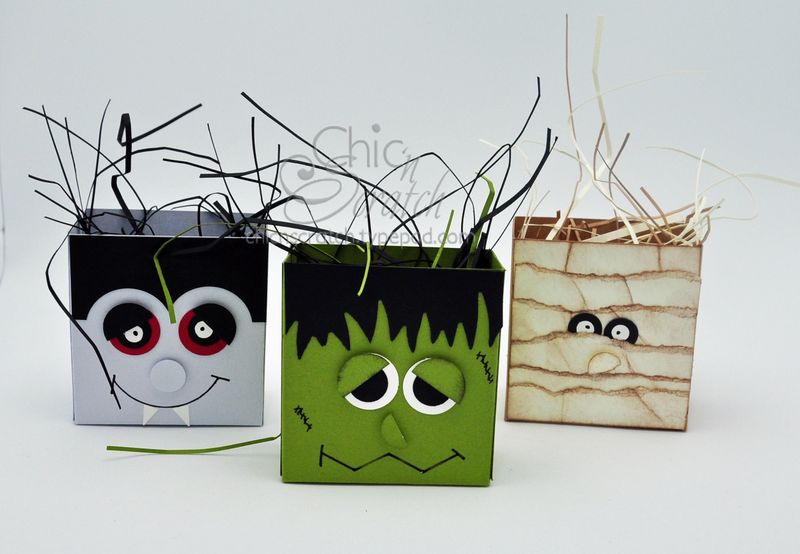
I made the Dracula, Mummy, Frankenstein and three other boxes. The box measurements are the same, I just decorated it differently.
Supply list to make the Frankenstein Box:
Notes for Kit Kat Holder
Here’s two more pictures of the other boxes…..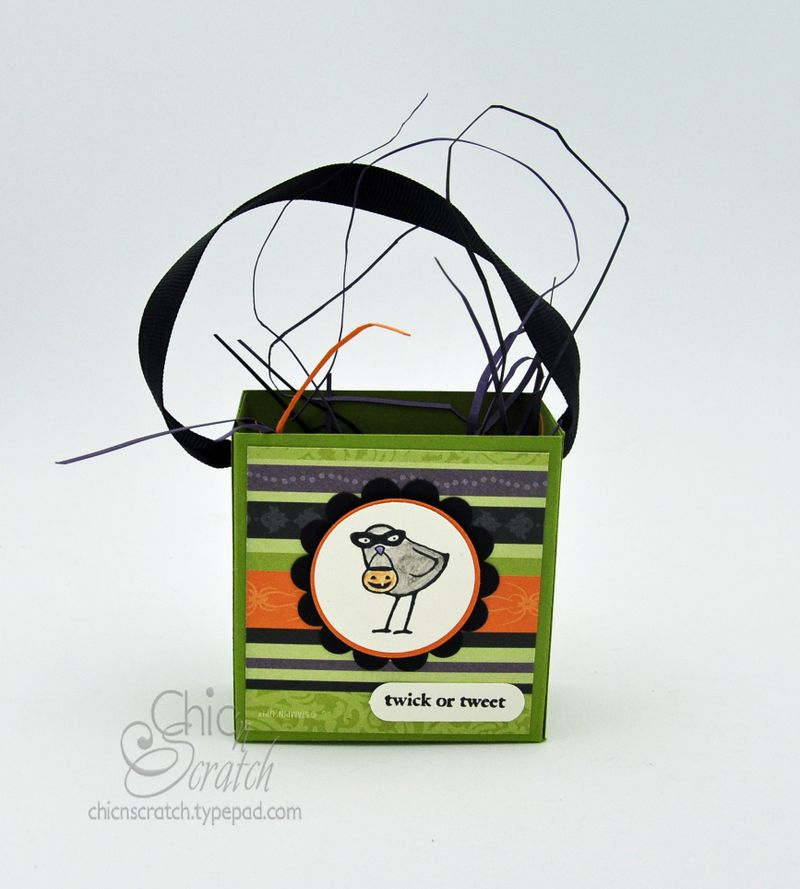
Supply List:

Twick or Tweet Box
My project today is one that I’ve been waiting a week to show you. I used the brand new Twick or Tweet stamp set from the Holiday Mini Catalog. And, I used the Cast a Spell Designer paper to decorate the box. (Club ladies, this is one of your September club projects.)

Supply List:
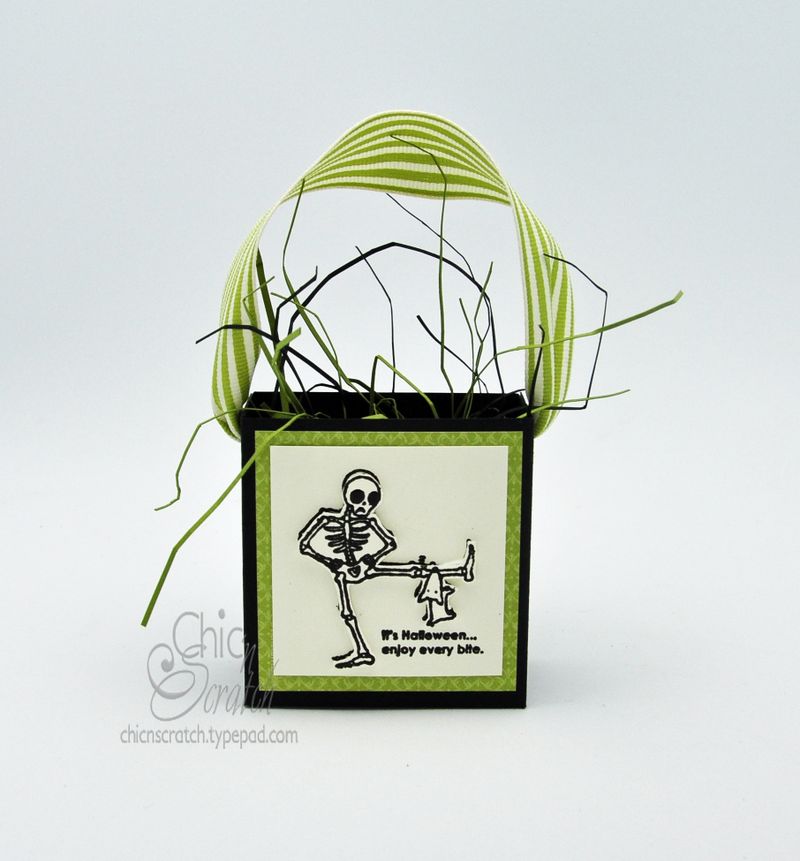
I’ve decided to call it the Little Halloween box because I came up with the idea all on my own. I filmed a video to show you how I made it and how I came up with this size. But…instead of showing you how to make it with this design….I decorated it with the Frankenstein. I’ve made about ten of these boxes and over the next couple days I’ll show you the others.
Here’s the picture of the Frankenstein, Mummy & Dracula. You can get two of these boxes per sheet of cardstock….isn’t that awesome?

Last year when I made 30 of the Franky boxes with the Rebar Tie Wire it took me hours to make them….so this year I decided to go with fast & affordable. I’m determined that this year I’m getting my goodies made early.
Have a great day!!
Click here if you’d like to place a Stampin’ Up! order.
p.s. The box is loading on You Tube now and as soon as it’s done I’ll post a link right here when it’s available.
What’s next? Tomorrow I’ll post the Free stamp set winner for August and the Free set for September. I’ll also post the details for the Creative Contest. (If my headache goes away I may get it posted this evening but for now I need to focus on getting rid of this terrible sinus headache…..it’s that time of year again!)

Dracula Mummy & Frankenstein Candy Bar Holders
The video on how to make the Dracula Candy Bar Holder is ready & posted on my Chic n Scratch Live! website. Click here to go there now. Here’s the photo as a reminder…..
After making the Kit Kat/Candy bar holders I couldn’t resist making them into a box (you’ll see it on the Dracula video). It’s a box that I created myself and I’ll post the video for you on Monday, it’s already filmed I just need to edit and load it on You Tube.
The picture I’m sharing today is coming from left field but it’s something I’ve wanted for a long time and decided to share it with you. My stamps are finally organized…perfectly 🙂 It’s taken me forever and I cant’ take credit for it (I had a few helpers along the way). I’ll share the photo and then explain.

The first thing I like to do when I get a new stamp set is label it with my PTouch. (A PTouch is the most awesome labeling machine in the whole world, I bought my first one in 1992….are you wondering how I know what year? That’s the year Chase was born….back when I used to be very organized.)
Next I l add a small dot that reflects what category it goes in. I follow the same categories that’s in the Stampin’ Up! catalog….makes perfect sense to me 🙂 The pumpkin dots are Greetings, Red are Holidays, Black are Elements, Chocolate are All Natural, Old Olive are Occasions, Bashful Blue are Growing Up, Lavendar Lace are Hostess, YoYo Yellow are Mini Catalogs. What I did was run my cardstock through a Xyron and then punched the circles with my 1/2 circle punch.
Have a great day!!