Painted Seasons Gift Bag by Chic n Scratch, Stampin’ Up! Demonstrator Angie Juda

The Painted Seasons Gift Bag is the 3rd project included in my Painted Seasons Make n Take Packet.
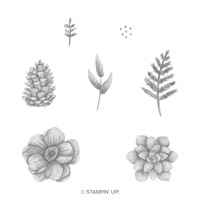
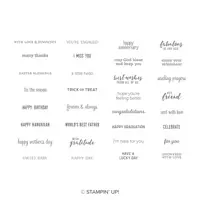
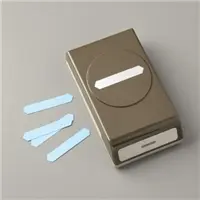
I used the Painted Seasons Bundle with the Itty Bitty Greetings Stamp Set (in my video I used the retired Sunburst Sayings Stamp Set … oops!!) You can use any greeting that fits in the Classic Label Punch.
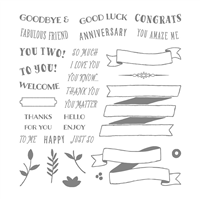
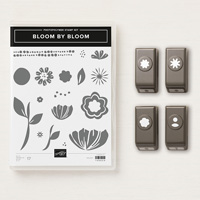
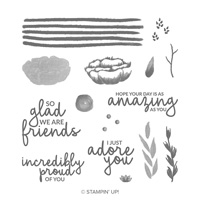
Your other option is to use the Incredible Like You Stamp Set with the Bloom by Bloom Stamp Set and coordinating Bitty Blooms Punch.
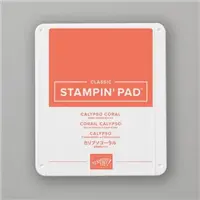
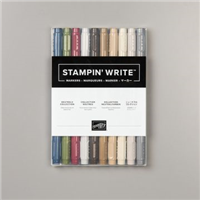
After I inked up the flower image with the Calypso Coral Stamp Pad I used the Early Espresso Stampin’ Write Marker and applied ink right to the stamp by brushing it on. This is why I always say that you will want to keep your Stampin’ Write Markers (even though you see me use the Stampin’ Blends Markers 98 percent of the time).

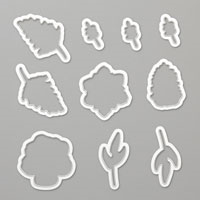
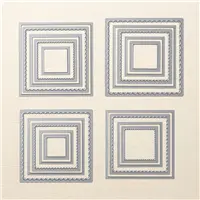
I cut the flower image out the the Four Seasons Framelits Dies … they’re one of the Sale a Bration Coordination items. The other two layers are: Whisper White – Stitched Shapes Framelits Dies and Early Espresso – Layering Squares Framelits Dies.
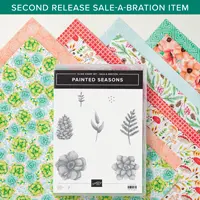
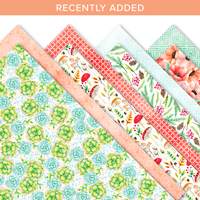
To make this Gift Bag you need two 6 x 6 pieces of the Painted Seasons Designer Series Paper and the Make n Take Packet includes both sheets.
Painted Seasons Make n Take
- Place a minimum order of $50 using Host Code: FG2EVK9V
- Receive a make and take packet to complete four projects using the Painted Seasons Designer Series Paper. All four projects will be shown on my blog this week.
- Eight 6 x 6 sheets of the Painted Seasons Designer Series Paper
- Card Stock and Embellishments to complete all four projects.
- Bonus Project
Facebook Live

I’ll be going LIVE on Facebook tonight. It will take place at 7pm central time over on my Chic n Scratch business page.
Click here to go there now. If you can’t see the video at 7pm … give it a few minutes and try again.
I love comments!! If you have any questions/comments about this post please leave a comment.
Thanks & have a great day! ?
My other offerings…

Stock up on your Stampin’ Up! Adhesive and save money!!
This year our price reflects FREE TAX and FREE SHIPPING.
These Adhesive Bundles would be a perfect gift for any papercrafter and Mother’s Day is just around the corner!!
UPDATE on Adhesive Totes: Orders placed before March 12th have shipped!

Any size order receives the Stampin’ Anonymous Tutorial FREE!
You have three ways to get these amazing tutorials….
- Receive it FREE with any Stampin’ Up! order placed with me this month.
- Purchase the PDF tutorials for $9.95 (one month cost). Click here to Buy Now.
- Join my Team! They get them free!
- Sale a Bration – More product available – Click here for all the details!
- Chic Rewards
- Join Stampin’ Up! for $99 – Starter Kit value $175
- Chic Stands & Coasters
- March 2019 – Host Code: FX7T2ZGW
If you would like to purchase any of the product used in making my project, here’s the Stampin’ Up! Shopping List:









Love the awesome little gift bag. I made a gift bag for my girlfriend a
while ago & she loved it so much. I will have to make this little one in a
matching DSP for her. Thanks for sharing Angie
Such a cute little bag. Thinking of all the uses I could you this for.
I forgot to mention to you that you are doing GREAT with the liquid glue I have a hot mess when I use it & now you have encouraged me to stick with it & master it. LOL Thanks Angie..Peggy
Seriously I get glue everywhere when I use it too. I do like it though, because you can reposition with it so easily, because I also tend to put things on crooked! lol This is a great little bag and I can see it as a favor bag for a shower. Thanks for the inspiration!
So pretty! Love the flower!
So pretty. I just got this DSP and I want to try this.
I love, love, love that paper. The bag is just the right size for a small gift. Thanks for sharing.
Super cute bag..I will make this a lot and I love this paper pack.
Cute bag. If your glue bottle starts to get sticky ,take the wrap off and if any glue get’s on it you can wipe it off easy.
Have a great evening.
I avoid the liquid glue for the same reason, you’ve inspired me to practice with it. Nice gift bag Angie. I got the paper, now I wish I had the stamp bundle too.
Love all your videos. You make it so fun. I enjoy all the 3D projects.
Such a cute gift bag. That flower is gorgeous. You did great with the liquid glue. I agree though, sometimes liquid glue gets all over the place. LOL
Cute bag! I like that you make it look so easy to make. Thank you for sharing your time, talents, and inspiration with us.
this is a great bag Angie. love that paper too!!
watched your video on Facebook, love all the different boxes
Love your videos! Thanks for doing what you do so well!
love the paper you used for this bag, wish they would bring the painted season set into the new catalog.
Love Love your videos! Thank you for sharing
Love watching all your videos. I have learned so much from you
Cute gift bag. Love that you give alternative stamp sets to use. Thanks for sharing.
I love your videos.
Angie, I love your Facebook Lives. You make them so fun. Don’t become too structured. I love the spontaneity. Love giveaways too.
What a super cute gift bag. Thank you for all your great projects. 🙂
Love your videos!
I was so excited tonight I was actually able to make the Live. I love the bag with the ribbon handle you showed after the project you made. Looking forward to how to make a gift card box. I am just now starting 3-D projects. I usually just make cards. I have a goal every day to make one card and send it to someone, just to say or that I am thinking about them and not a social media post.
Cute gift bag love you’re videos
Thanks Angie for all you do. I think your videos are great. I can’t think of a single thing for you to improve!
Such a cute little bag! I could see a gift card and a little treat in this.
I love your videos and the projects you make. I get a lot of good ideas from watching you.
I also like the fun and friendly conversation too. So please don’t change too much. Just keep being you!
Thanks for your FB Live videos, Angie! Love the supply list and directions with the measurements. Posting them either before or after the Live is fine with me! I just appreciate so much all that do to share your fun projects with all of us!
Love the bag, Enjoy your videos and I like the fact that you have started to give the date. The liquid glue you are using is my favorite. I find it to be a very strong glue once it dries it also allows for a little wiggle room when you are doing a project. Thank you for all your tutorials you do I really do not see where you need to change a thing!?
I so appreciate your 3D projects! (Not saying your cards are shabby though.) You have an unique style that is fun. In regards to your question of tweaks – I do like it when you show alternative products that can be used in case I don’t have that particular punch or stamp set. Thank you.
Love ALL of your projects! They’re great!
You ask for suggestions, it’s hard to improve on perfection but if I rack my brain I would say more examples in your demos, I think someone suggested more fun conversation, more is always better but where in the world will you find the time, thank you, good luck and God Bless.
thanks Cindy!
I really love this box! I’m for sure going to make it? I love watching your lives and your 3D projects. Thanks so much for sharing your talent!
Love the bag! All of your projects have been adorable! Love the inspiration sheet and supply list. They are very helpful. I really enjoy watching your lives and coffee and a card! Thanks so much for sharing.
Cute gift bags! Always enjoy your videos. Thanks for sharing. 🙂
Adorable gift bag. Love your projects. Thank you.
Angie, been wondering if I should get the matching markers for my ink pads. Do you recommend it for a newbie? Or just start with ink pads? This paper pack speaks to me since my favorite color is orange!! Hugs!
My girls and I will be getting together for Mother’s Day weekend. We spend the weekend making cards maybe we will ad some boxes this year.
Hi Theresa, that is a really good question. My opinion is that you should get your favorites. Have a great day!
I love your 3D projects and would like to see some gift card holders. A few more cards/tags would be nice, too. But, don’t change too much; your live videos are great as they are! I do have a question about the Distinktive stamps. I am really struggling with consistently getting a good image with them. Do you have any suggestions?
The key to some of the images is you need less ink. Too much ink on the image isn’t good. Normally I really ink up an image but with the Distintive stamps … I only apply a small amount. I hope that helps.
I make a mess with glue too. Love your lives. Don’t need to change anything for me.
Really enjoy watching you create all of the projects ♥️
So adorable. Angie I made the basket with the Bella and friends, so stinking cute. Thanks for all the great ideas.
Love your real creations…shows your human side when you fix something as you go…don’t get too structured…many thanks as always…
Love this bag! The paper is beautiful!
Hi Angie, hope you are well I been so busy I have messed up this March with going exciseing in the pool with my phone so its not working after rice and damp ride frowns. On March 7th then miss under standing the order I took that day and was late on it but thank God he still took it. smiles as it was for this past Saturday. Now going get ready for Easter sales and then the weekend after is my town party craft fair. I am exsauted I have been working since Christmas good but tired and sore. Still organizing move in between orders and the holidays. Ok aloha my friend
Very pretty bag. Thanks for sharing,
Darling easy-to-make bag. Thanks, Angie!
very cute!
Wowzers – LOVE than paper! This project is so pretty =)
Hi Angie, very pretty bag. Like both samples u made. Hagd. Loretta
Adorable little gift bag! Always love your projects!
Love this bag! I am going to make it for my mom for Mother’s Day if I can find some special jewelry to put in it!!!
Love the bag
Cute design. I like the folded over edge and how you colored the center of the flower with a marker.
Love this stamp set and still need to get the matching die set
The painted season paper is so pretty! I love the bag! Thanks for sharing
the painted season paper bag! I am anxious to make one!
Love this cute gift bag! It would be great for Easter treats!! Thx for sharing!!! 🙂
I love this DSP
Such a cute bag!
Absolutely darling project. Thanks for all the inspiration.
Thank you Angie, I love watching your videos – helps me to get my creative juices flowing!!
Very cute littke treat holder. Love the painted seasons!
Love the bag, Angie! Another great project!
Sweet gift bag
Love this DSP
Always love the bag projects. They are cute and easy and can be used for so many things.
Happy Crafting