Easter Bunny Box

Easter Bunny Box

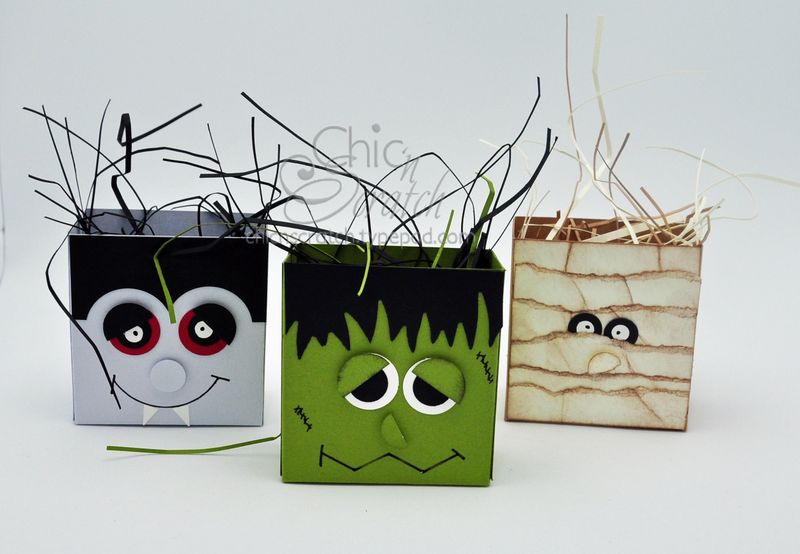
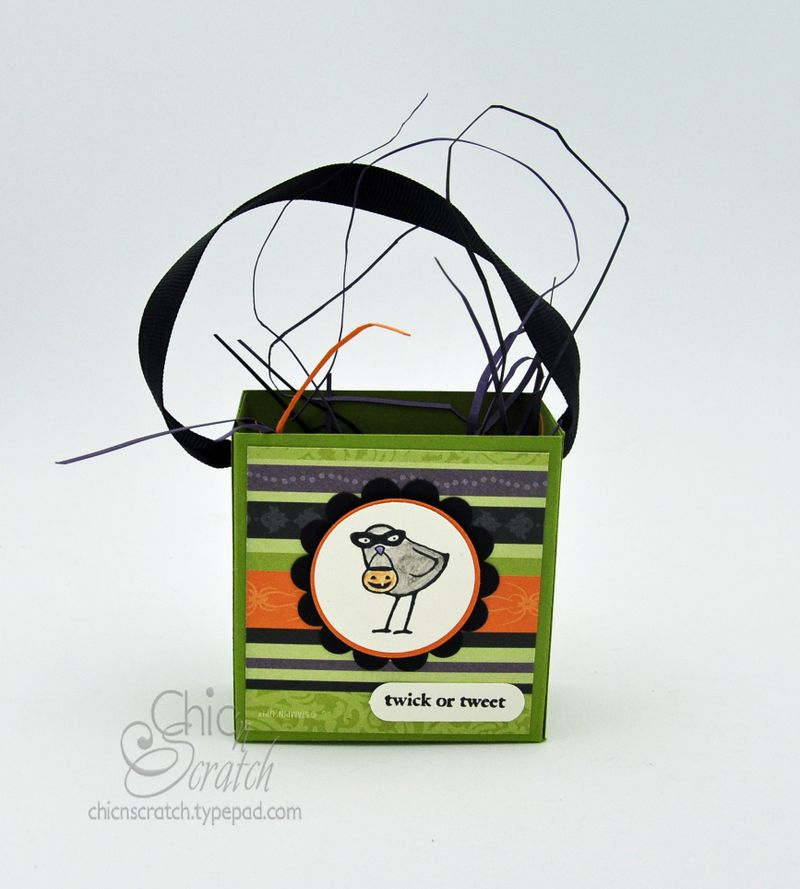
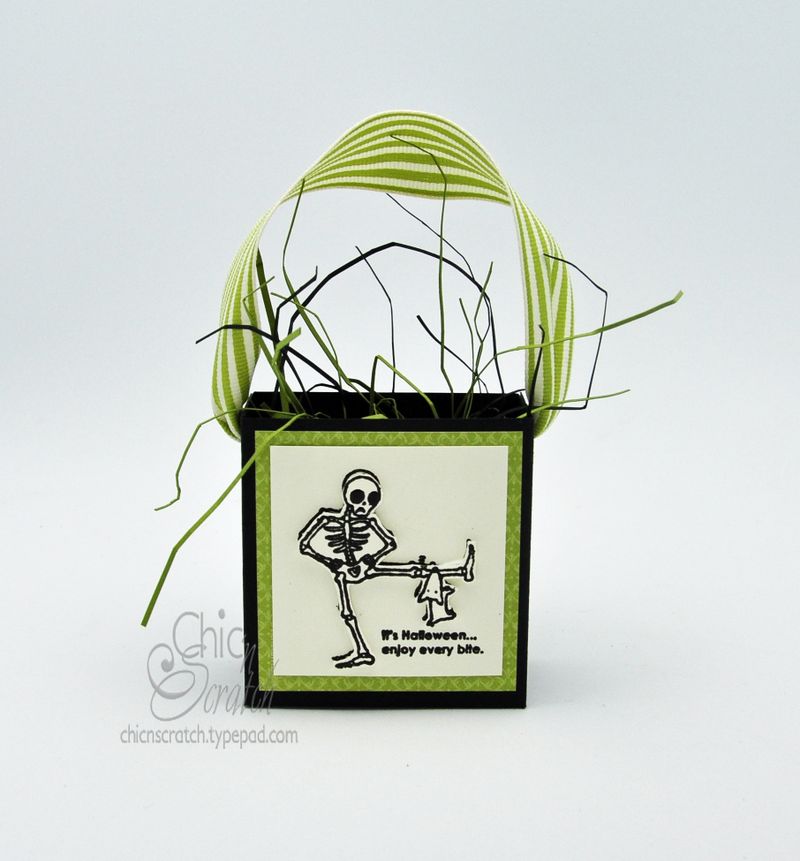
My video today is on how to make this Easter Bunny Box. You have two choices, you can make it just like this picture….or you can step it up and add some handles. (Handles are rebar tie wire found at Lowes in the lumber area.)

Bunny handles

Click here to watch my video on how to make the Punch Art Bunny Face.

Here’s the video … 

Angie Supplies Graphic

 
  • Confetti White Cardstock #102028
  • Teeny Tiny Wishes Stamp Set #115370
  • Black Classic Ink #101179
  • Sweet Pea Designer Paper #117161
  • Word Window Punch #105090
  • Stampin’ Dimensionals #104430
  • Crinkle Paper
  • Hole punch
  • Re-bar Tie Wire (hardware store)

Thanks for joining me!!

Angie Order Signature with divider

Savanna Bag Tutorial

How to make a Savanna Bag Video tutorial by Angie Juda

We share three sizes of the Savanna Bag in the video but we will demonstrate how to make the larger size. 

Our scallop squares were cut with the Scallop Square Die but you could use a Charm Pack instead.  The squares are only slightly larger. But don’t forget to increase the size of your fusible fleece. 

Update: I’ve combined all four videos into one video, here ya go….

Here’s four videos to show you how to make the Large Savanna Bag. Also known as the Savanna Purse.

I used the Big Shot Die Cut Machine with  the Scallop Square die to cut the fabric.

Video 1

Video 2

Video 3

Video 4

Thanks!

Chic n Scratch Bloopers #3

I hope you get a kick out of my Bloopers #3.


Happy New Year!!


Tall Top Note Box

Santa Box
This video will demonstrate how to make the Tall Top Note Box.


Here’s the video…


Here’s the supply list:

  • Serene Snowflake stamp set
  • Christmas Greetings stamp set
  • Top Note Die
  • Big Shot Die Cut Machine
  • White Craft Ink
  • Basic Black Ink
  • Creamy Caramel Ink
  • Pretty in Pink Ink
  • Stampin’ Pastels (chalk)
  • Scallop Circle Punch
  • Small Oval Punch
  • Full Heart Punch
  • Word Window Punch
  • 1/2 Circle Punch
  • 1 3/8 Circle Punch
  • 1/4 Circle Punch
  • Sponges
  • 2-Way Glue Pen
  • Stampin’ Dimensionals

Click here if you’d like to purchase the instructions for the Tall Top Note Box.  It includes a diagram of where to cut, score & apply adhesive.  Click here for the Punch Art Santa.

Thanks!

Click here if you’d like to place a Stampin’ Up! order.

Reindeer Top Note Box

Good afternoon,

My project today is the same Top Note Box as yesterday….except I used the Punch Art Reindeer on it instead of the Punch Art Santa 🙂

Reindeer Top Note
I’m not sure which one I like best….they’re both so stinking cute!!

If you would like to see how to the make the Punch Art Reindeer, click here to head over to my Chic’ n Scratch Live! website to see the video. Or if you’d like to purchase the instructions on how to make the Reindeer click here to head over to my Chic’ n Scratch Shack.  

The Punch Art Santa video is ready on my Chic n Scratch Live! website, click here to go there now.   And, click here if you’re interested in purchasing the Punch Book Page or the written instructions.

The Tall Top Note box video is loaded on You Tube and I’m working on getting it ready to post & working on the instructions.

Have a great day and thanks for stopping by!!

Click here if you’d like to place a Stampin’ Up! order.

p.s. in less than 12 hours I’ll be watching New Moon….it’s going to be very hard to think about stamps or quilting tomorrow!!  I’m sure I’ll be totally obsessed with New Moon and want to talk about it all day.  That’s why we’re going to see it again tomorrow afternoon.   Get this….I made a new Rag Quilt Purse just to take to the movies.  I’m thinking I should have made a blanket given all the hours we’ll be there.

Punch Art Santa Video

This video will demonstrate how to make this Punch Art Santa.

Here’s the video….


Here’s the supply list:

  • Basic Black Ink
  • Creamy Caramel Ink
  • Pretty in Pink Ink
  • Stampin’ Pastels (chalk)
  • Scallop Circle Punch
  • Small Oval Punch
  • Full Heart Punch
  • Word Window Punch
  • 1/2 Circle Punch
  • 1 3/8 Circle Punch
  • 1/4 Circle Punch
  • Sponges
  • 2-Way Glue Pen

If you would like to purchase written instructions that include a page for your Punch Book, click here to head over to my Chic’ n Scratch Shack.

Thanks!

Click here if you’d like to place a Stampin’ Up! order.

How to make Quilted Flowers

Today’s video is on how to make these Quilted Flowers.   Enjoy!

6a00d8341d73f053ef0120a6497e2b970c-400wi 

Supply List:

  • Flower Folds Die #115970
  • Scallop Circle #2 Die #113469
  • Big Shot Die Cut Machine #113439
  • Quilt Basting Spray
  • 1 1/4″ Striped Grosgrain Ribbon
  • Crop a dile #108362

Click here if you’d like to place a Stampin’ Up! order.

Little Halloween Box

Frankie Box | Frankenstein Box | Franky Box

Today’s video is on how to make the Frankenstein box or a Kit Kat Holder.  The only size difference is the hair measurements (the hair on the Kit Kat holder is 2 1/2, versus 2 3/4 on the box).

Little Halloween boxes

I made the Dracula, Mummy, Frankenstein and three other boxes.  The box measurements are the same, I just decorated it differently.

Supply list to make the Frankenstein Box:

  • Old Olive Cardstock 2 pieces 5 1/2 x 4 1/4 and score at 1 3/8 on two sides & bottom
  • Black Marker
  • Hair is a Grass die found at our local scrapbook store (measures 2 3/4 x 1 3/8)
  • White Eyes – 3/4 Circle
  • Black Eyes – 1/2 Circle
  • Old Olive Eyelids – 3/4 Circle  (cut in half)
  • Old Olive Nose – 1/2 Circle (cut in half)
  • Stampin’ Dimensionals
  • Black ink
  • Sponge
  • Adhesive
  • Template for mouth

Notes for Kit Kat Holder

  • Hair will measure 2 1/2 x 1 3/8
  • 10 1/2″ Black Grosgrain ribbon needed for handle
  • Modern Label Punch to punch for the candy bar

Here’s two more pictures of the other boxes…..Little halloween box

Supply List:

  • Twick or Tweet Stamp set #116497
  • Scallop Circle Punch – Black cardstock #109043
  • Word Window Punch – White Cardstock #105090
  • Old Olive Cardstock – Box
  • Cast a Spell Designer Paper #115677
  • Black Grosgrain Ribbon#115605
  • Watercolor Pencils #
  • Blender Pen #102845
  • Crop a dile (used to make the holes for the ribbon) #108362
  • 1 3/8 Circle Punch – White Cardstock #104401
  • 1 1/2 Circle from Circles #2 die #114526 – Pumpkin Pie Cardstock

Twick or Tweet bite

Click here if you’d like to place a Stampin’ Up! order.


Dracula Candy Bar Holder

Today’s video is on how to make the Dracula Candy Bar Holder (the Mummy video has been filmed and will be loaded asap).

Halloween Mummy & dracula_edited-1

Here’s a list of supplies to make the Dracula:

  • 1 1/4 Circle Punch — Hair
  • 3/4 Circle Punch – Red Eyes
  • 3/4 Circle Punch – Black Eyebrows
  • 1/2 Circle Punch – Black Eyes
  • 1/2 Circle Punch – Almost Amethyst Nose
  • 1/4 Circle Punch – White Eyes (handheld punch)
  • Large Star Punch – White Teeth/Fangs
  • 10 1/2″ Black Grosgrain Ribbon
  • Almost Amethyst Cardstock 10 x 2 1/2


Click here if you’d like to place an Stampin’ Up! order or join my team.


Halloween Kit Kat Holders

Halloween Kit Kat Holders | Frankie Kit Kat Holder | Mummy Kit Kat Holder | Dracula Kit Kat Holder

I hope you think these goodies are worth the wait.  I started working on the Halloween Kit Kat Holders yesterday and didn’t want to show them to you until I finished all three.

Halloween Kit Kat Holders

You’ve seen me make the Frankenstein & Mummies over the past three years but the Dracula is a new one for me.   I owe my friend Julie a huge thanks (thanks Julie!! I owe you one) I had trouble figuring out how to do his hair and she emailed me a picture this morning on how to use a circle punch to make his hair.

I’ll get busy filming the videos tomorrow. Do you want to see a video on how to make each one of these or just the Dracula?   To make the Kit Kat Holder I have video available on my Chic n Scratch Live! website and you can click here to view it.  Or to make a mummy I have a picture tutorial available and you can click here to view it.

Halloween Mummy & dracula_edited-1

Thanks for the emails and kind words about my first audio message.  I was nervous and excited all at the same time. 

Thanks for stopping by!!

Click here if you’d like to place a Stampin’ Up! order or join my team.

Item added to cart.
0 items - $0.00